
A dull knife is an accident waiting to happen. Hone your skills (and keep your fingers) with this handy sharpening guide for kitchen knives.
Most of us are guilty of using a dull knife more often than we’d like to admit. While you may not need a razor sharp blade to cut a cucumber, try to carve a whole roasted turkey and you’ll run into trouble. Contrary to what you might expect, a dull knife is far more dangerous to use than a sharp knife.
Keeping your knife sharp is the best way to ensure even slices—and prevent a trip to the ER for stitches. Learning this basic—but essential—culinary technique takes practice and perseverance, but it’s well-worth the effort. Master the art of knife sharpening, and you’ll become a faster, safer, and far more efficient cook in your kitchen. Professional chefs swear by a properly honed (or sharp) knife—and so will you.
Here, find everything you ever wanted to know about knife sharpening, from different types of sharpeners to clever tricks to tell if your knife is sharp.
Types of Knife Sharpeners
From steel to stone, there are numerous ways to sharpen a knife. Not all are interchangeable, however, and each one serves a very specific purpose. Regardless of which method you use, remember to sharpen both sides of your knife. Additionally, holding your knife at the optimal angle (10 degrees for blades up to 6 inches long, and 15 to 20 degrees for longer blades) against the surface ensures a perfectly honed blade. Here’s a breakdown of each sharpening method.
1. Sharpening Steel
A sharpening steel is a long, skinny rod that’s used to hone—or sharpen—a knife that’s fairly sharp to start. Your steel is great for everyday maintenance, but if your knife is already dull, it’s more or less useless. Use it to give your knife an extra “edge” before carving a whole bird (try this one: Wusthoff 10″ Knife Sharpening Steel, $24.95, Amazon).
How to Use a Sharpening Steel: Hold the steel in one hand, and have your knife in the other. Apply pressure and make a sweeping motion across the steel, making sure you hone the entire blade from the base to the tip. (Gordon Ramsey demos the classic technique above—but for a simpler method, watch this helpful knife honing video from Food & Wine.)
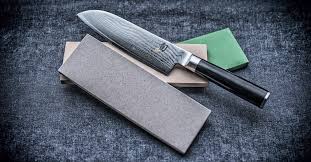
2. Sharpening Stone
A staple of many professional kitchens, a sharpening stone is a tried-and-true method for honing a knife. Why? It’s reliable, durable, and produces a flawlessly sharp blade when executed correctly. Using a stone isn’t the fastest sharpening method out there, but it does give you an even blade that cuts cleanly through just about anything.
A stone isn’t necessary for everyday maintenance, and it’s best to use it when your knife has significantly dulled. You may need to use a stone every week or every month—it depends on how often you use your knife.
There are three types of sharpening stones you’ll see—oil stones, diamond stones, and whetstones—and each one has its pros and cons.
- Oil stones need to be greased with oil beforehand, which can make using them a bit messy.
- Whetstones must be soaked in water first, and they deliver a pristine, extremely sharp blade when used correctly. However, whetstones are also fragile and less durable they other types of stones.
- Diamond stones, on the other hand, are extremely durable and can be used dry, but they’re generally a bit more expensive.
For your first sharpening stone, we suggest an inexpensive, workhorse stone, such as a combination whetstone (try this one: Winco 8” Combination Sharpening Stone, $6.79, Amazon). Look for a whetstone with a rough side and a smooth side, and choose one that’s at least 8 inches long. Using a stone takes practice, so don’t be frustrated if it takes you several attempts. You’ll do most of the work on the rougher, coarse side of the stone—then you’ll use the smoother side for fine tuning.
How to Sharpen a Knife with a Whetstone: First, soak your stone for at least 10 minutes in cold water. Next, hold your knife on the flat side and angle the blade at about 20 degrees against the stone. Starting at the base of the blade and ending at the tip, gently sweep it across the stone (it should sound a bit like grinding on sandpaper). Flip your knife over, and repeat the motion on the other side of the blade. Alternate sides until the blade starts to feel sharp, then finish the job with the smoother side of the stone.
3. Ceramic Plate
If your knives are dull but you don’t own a steel or stone, this clever hack is pure gold. It turns out, the rough area on the back of a ceramic plate is a perfect surface for sharpening your knives. Don’t be afraid of smashing your plate (Jacques Pepin can pull it off, and so can you). Secure the plate, then simply use the same back-and-forth motion as you would with a stone. Don’t have a plate? Try the rough area on the bottom of a coffee mug.
4. Electric or Handheld Knife Sharpeners
There are plenty of basic and jazzed up electric knife sharpeners out there, but hear us out—you don’t need any of them. Yes, an electric knife sharpener will get the job done much faster than a stone, but it’s probably one of the worst things you can do for the long-term health of your knife.
An electric knife sharpener uses motorized abrasives that may chip away at your blade during sharpening. A stone is much easier on your knife and also allows for greater control on your end. If you have a cheap knife, go ahead and use a handheld or an electric sharpener. But if you’ve spent several hundred dollars on a top-quality knife, avoid using these tools.
5. The Professional
Okay, maybe not this exact guy—but your local knife sharpening specialist is a great resource if you don’t own a stone or a steel. Prices vary, but you can feel confidently that your knives will be returned razor sharp, ready to slice and dice. Also, take advantage of free services offered by retailers such as Williams Sonoma or Sur La Table.
Yes, you can effectively sharpen your chef’s knife or paring knife at home, but serrated and scalloped knives tend to be a bit trickier. Consider taking these knives to a professional to sharpen.
How to Tell If Your Knife is Sharp
After honing your knife, you’ll want to make sure it’s nice and sharp before you start slicing away. You can fleck the blade against your thumb to check its sharpness, but this isn’t always the easiest (or safest) indicator. Here are two reliable tests for testing knife sharpness:
Tomato Test: Using a chef’s knife or paring knife, try slicing through a ripe tomato. If the knife slides easily through the skin, then you can be sure it’s plenty sharp. If it doesn’t, try honing the knife with a steel—and if that doesn’t work, then it’s back to the sharpening stone.
Paper Test: If you don’t have a tomato, the paper test is a perfect workaround. Take a piece of construction or computer paper. Starting at the top of the paper, try to slice your knife through the entire piece of paper. If it cuts easily, then your knife is sharp.
How to Keep Your Knife Sharp
Yes, sharpening a knife takes time and effort—so once you’ve worked hard to hone it, you’ll want to make it last. Here’s a few basic knife care tips to ensure that your blade stays sharp:
- Don’t Wash Your Knife in the Dishwasher: Dishwashing detergent is hard on your knife and may dull the blade over time. Instead, gently scrub your knife with dish soap and hot water. Dry the knife completely with a dish towel, then store it.
- Don’t Store Your Knife with Other Kitchen Tools: Give your knife the TLC it deserves, and don’t just toss it haphazardly into a drawer with spoons, whisks, and tongs. A knife block or magnetic knife strip are the best ways to protect your knife blades.
- Always Use a Cutting Board: We’ll let you get away with cutting on a marble countertop or glass surface once or twice—but please don’t make it a habit. Hard surfaces such as these can dull your knife pretty quickly.
When it comes to sharpening knives, practice makes perfect. To build your skills, watch instructional videos online or consider taking a knife sharpening class. Check your local culinary school or kitchen retailer such as Sur La Table, as they typically offer a variety of technical classes.